

how to create an index in word 2013
 Please Note: This article is written for users of the following Microsoft Word versions: 2007, 2010, 2013, 2016, 2019, and Word in Office 365. If you are using an earlier version (Word 2003 or earlier), this tip may not work for you. For a version of this tip written specifically for earlier versions of Word, click here: Creating an Index Entry.
Creating an Index Entry
Word includes a feature that allows you to automatically create an index for your document. How you create the actual index is explained in a different tip, but first you must insert index entries throughout your document. These entries are used by Word to pull together the information that is placed in the index. To create an index entry, follow these steps:
- Select the text you wish to appear as the index entry.
- Press Alt+Shift+X. Word displays the Mark Index Entry dialog box. (See Figure 1.)
- Click on Mark.
- If you want to mark additional index entries, select them in your document, and then click on Mark.
- Click on Close to dismiss the Mark Index Entry dialog box.
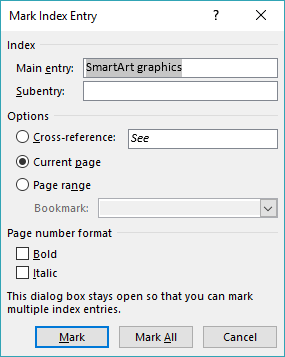
Figure 1. The Mark Index Entry dialog box.
Word also allows you to create index subentries. These are index entries that are subordinate to other index entries, and generally appear indented under the main index entry. To insert an index subentry, follow these steps:
- Select the text you wish to appear as the subentry.
- Press Alt+Shift+X. Word displays the Mark Index Entry dialog box. Notice that the text you selected is shown in the Main Entry text box.
- Press Ctrl+C to copy the selected Main Entry text to the Clipboard.
- Position the insertion point in the Subentry text box.
- Press Ctrl+V to paste the text into the Subentry text box.
- Change the information in the Main Entry text box to indicate the main index entry to which this subentry should be subordinate.
- Click on Mark.
- Click on Close to dismiss the Mark Index Entry dialog box.
WordTips is your source for cost-effective Microsoft Word training. (Microsoft Word is the most popular word processing software in the world.) This tip (12617) applies to Microsoft Word 2007, 2010, 2013, 2016, 2019, and Word in Office 365. You can find a version of this tip for the older menu interface of Word here: Creating an Index Entry.
Author Bio
With more than 50 non-fiction books and numerous magazine articles to his credit, Allen Wyatt is an internationally recognized author. He is president of Sharon Parq Associates, a computer and publishing services company. Learn more about Allen...
MORE FROM ALLEN
Upside-Down Text with PostScript
Got a printer that understands PostScript? You can use some simple PostScript coding to turn text completely upside down ...
Discover More
Putting Character Codes to Work
If you know the character codes for some characters of interest, you can use those codes to do lots of tasks. This tip ...
Discover More
Changing Kerning
When you need to adjust the space Word uses between characters, you need to adjust what is called "kerning." This tip ...
Discover More
More WordTips (ribbon)
Improper Index Page Numbers
Adding an index to a document can be a nice finishing touch, particularly if the document is a long one. What happens if ...
Discover More
Cross-Referencing Index Entries
You've probably seen an index where an entry says something like 'Obsidian: See igneous rock.' This sort of ...
Discover More
Adding Hyperlinks to an Index
Word provides a full set of tools you can use to generate an index for your document. One thing you can't do, however, is ...
Discover More
how to create an index in word 2013
Source: https://wordribbon.tips.net/T012617_Creating_an_Index_Entry.html
Posted by: helsleybeenter.blogspot.com
0 Response to "how to create an index in word 2013"
Post a Comment